

Configure and manage AppLocker policy with Intune
Create the desired xml files
AppLocker policies allow Endpoint administrators to restrict access to specific applications on Windows devices. These policies can be used to ensure that only approved applications are executed, which helps increase security and prevent malware attacks. AppLocker policies can be created based on file name, file publisher, and file path rules, and they can be applied to specific user or device groups. AppLocker policies are enforced by the Intune device management service, which provides ongoing monitoring and enforcement of these policies on managed devices.
How to set this up on Intune ? Easy !
From a Client Device, open Local Policy Editor. Browse to Computer Configuration\Windows Settings\Security Settings\Application Control Policies\Applocker.
Expand the Applocker > Right click in Executable Rules > start creating your rules
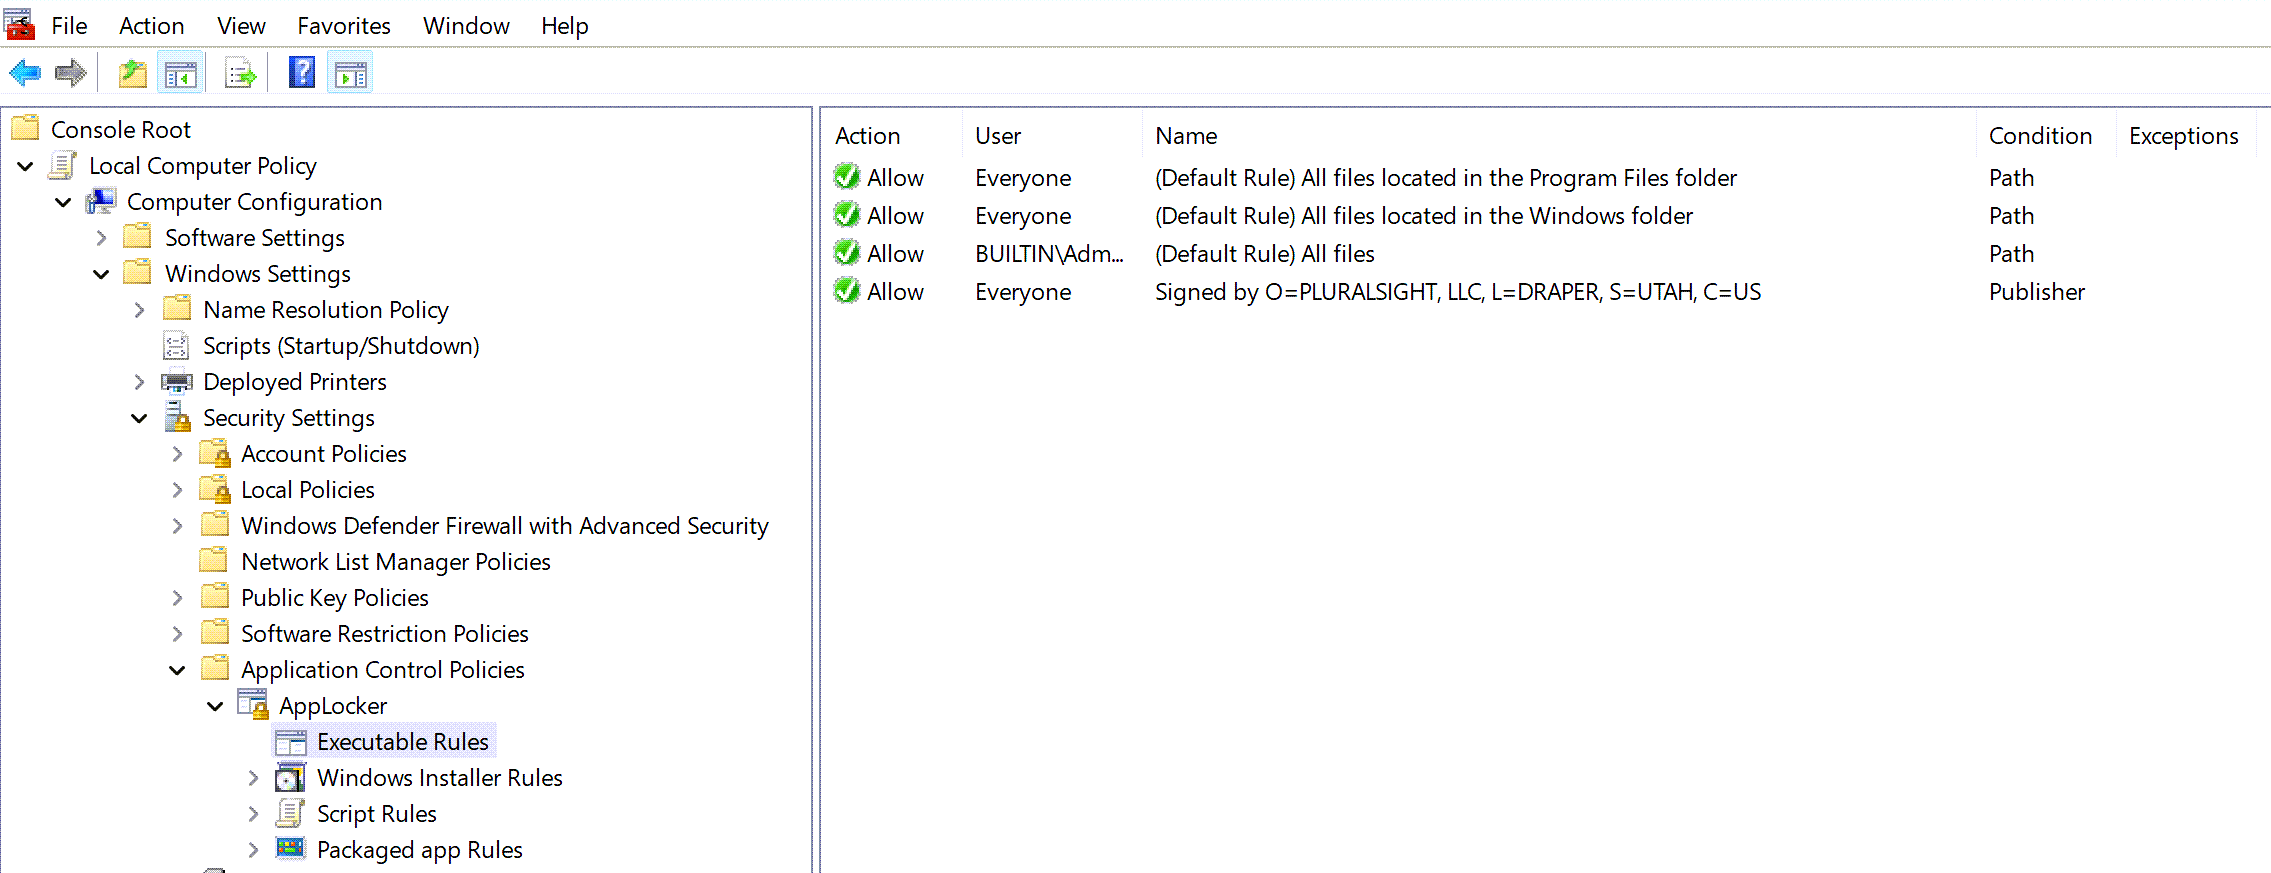
The above only shows 1 rule created. This means nothing else will be allowed to run. I recommend you create atleast 2 publisher rules along the 'default' created rules. One for Microsoft and one for the hardware manufacturer of your devices.
When done editing rules > Right click on 'AppLocker' > Export Rule > Save as AppLocker.xml
Note: If you already have a GPO on your 'on-prem' environement, you can export it by: Login in the Domain Controller and Edit the AppLocker Policy Right click in the AppLocker and select Export Policy !
Test your policy
When you're finished creating your rules, it's best you test them against some apps on your client devices where it will be applied on. To test an applocker policy we use the Test-AppLockerPolicy command. Here below an example syntax testing agains 1password:
Test-AppLockerPolicy -XmlPolicy "D:\Applocker.xml" -Path "C:\Users\user\AppData\Local\1Password\app\8\1Password.exe"If the applocker rule is correctly syntaxed and formated, no errors should appear. This Test-AppLockerPolicy command will show "Errors" in case something is wrong and detectable in the specified .xml file. In a case I worked on, duplicated 'Nodes' were mistakenly placed and not detected upon implementation. This resulted in instabilities when 'allowing' or 'blocking' some files from running. On a successful Policy test you will get a Blocked or Allowed result depending on the test. Testing the policy agains a specific .exe for example:

Multiple test scenarios are possible. See full documentation and more examples here:
Note: It is recommended to always test your AppLocker Policies before implementing them. Test them localy first and assign/implement them in 'waves' when applicable (DEV > Pilot > Prod).
Prepare your XML for Intune OMA-URI values
Open the exported xml policy with your favorite xml/text editor. The idea is to split this file into all 'RuleCollection Types' that will be used. Ideally you would have 1 for each types posible.
Remove the lines that are not needed leaving only what's within the 'RuleCollection Type' wanted. For example if an EXE rule is wanted, do as shown bellow:
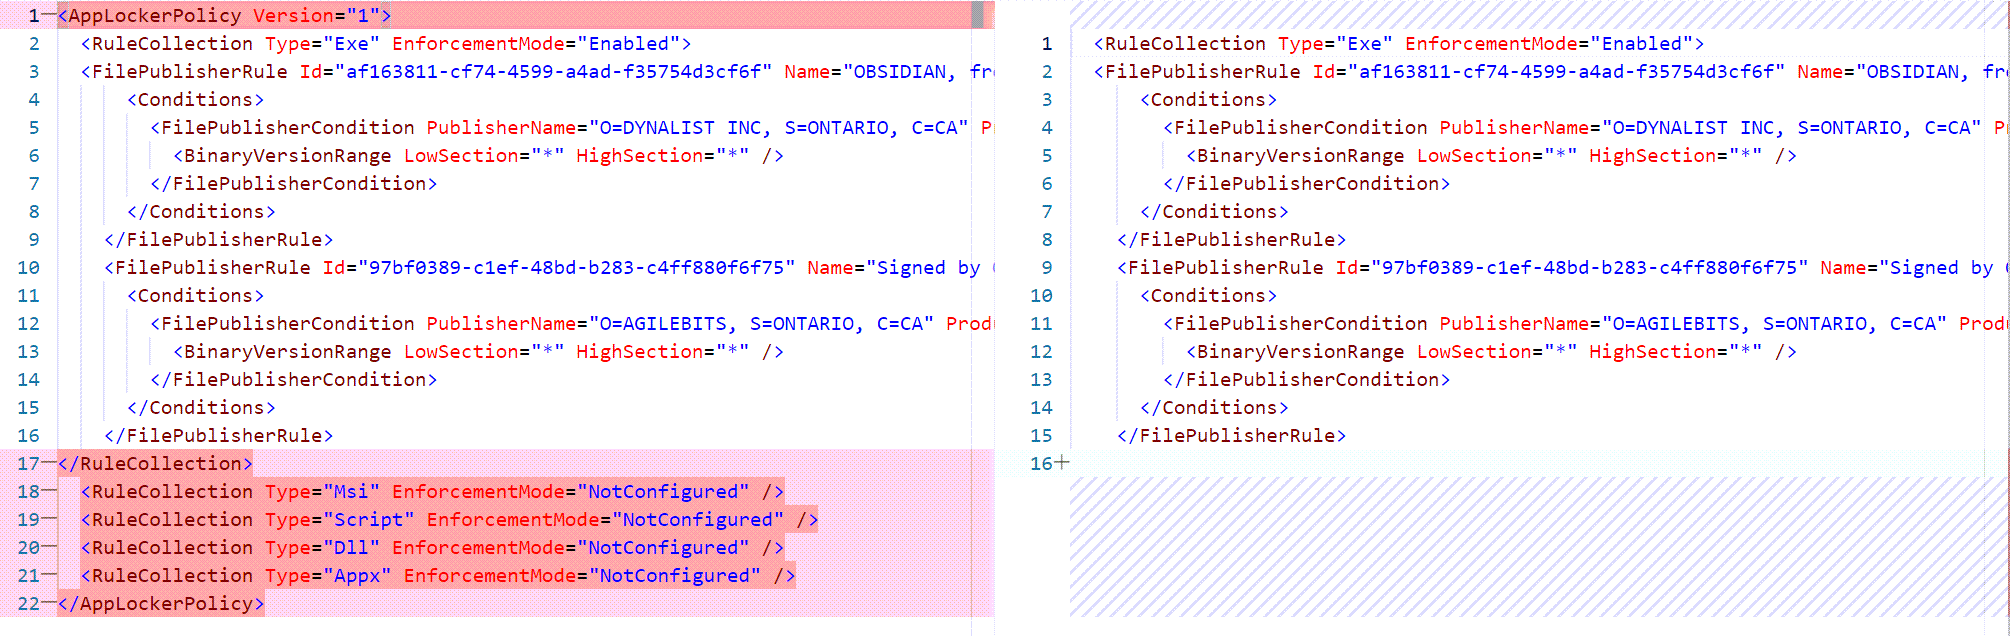
Follow the same logic when creating your MSI, Script or APPX rules.
Create Intune Policies and assign them
Login to your Intune Portal
From the shown blades, select Devices > Configuration Profiles > Create Profile > Create >
Give a name to your profile: Win10_Applocker and click Next > Click Add In the OMA-URI Settings
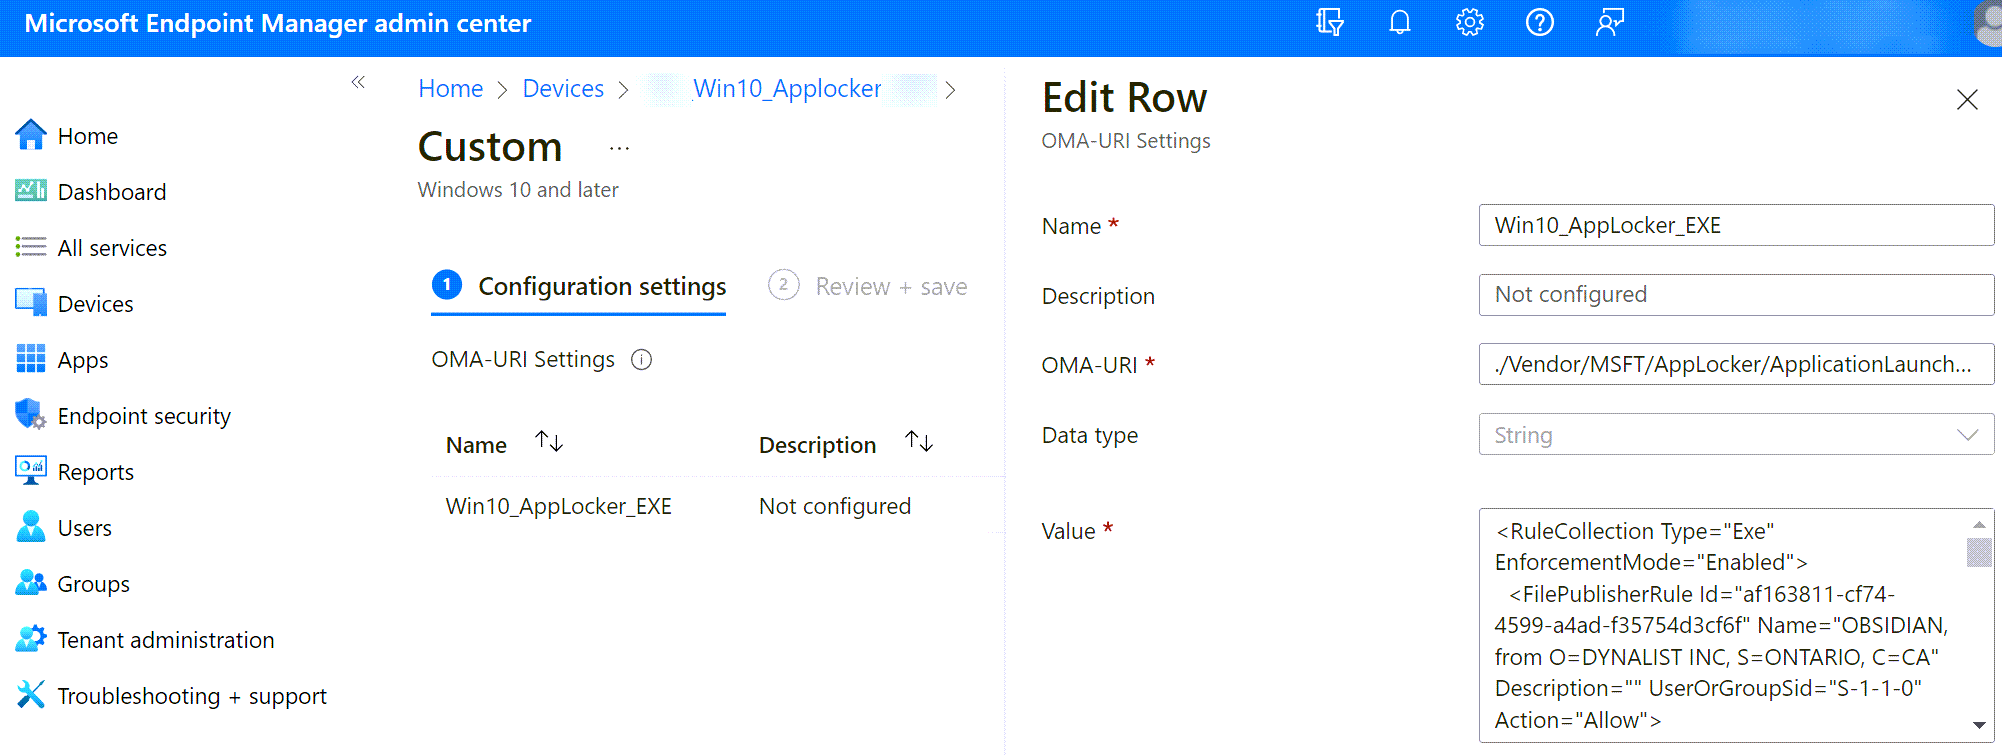
Feel free to add more 'Configuration Settings' for other Applocker items. You can also split each Setting in different 'Configuration Profiles' if they are supposed to target different groups. Follow the same logic as above to create the rest of settings. See table below:
Save > Assign your policy to targeted AAD Group.
Test implementation
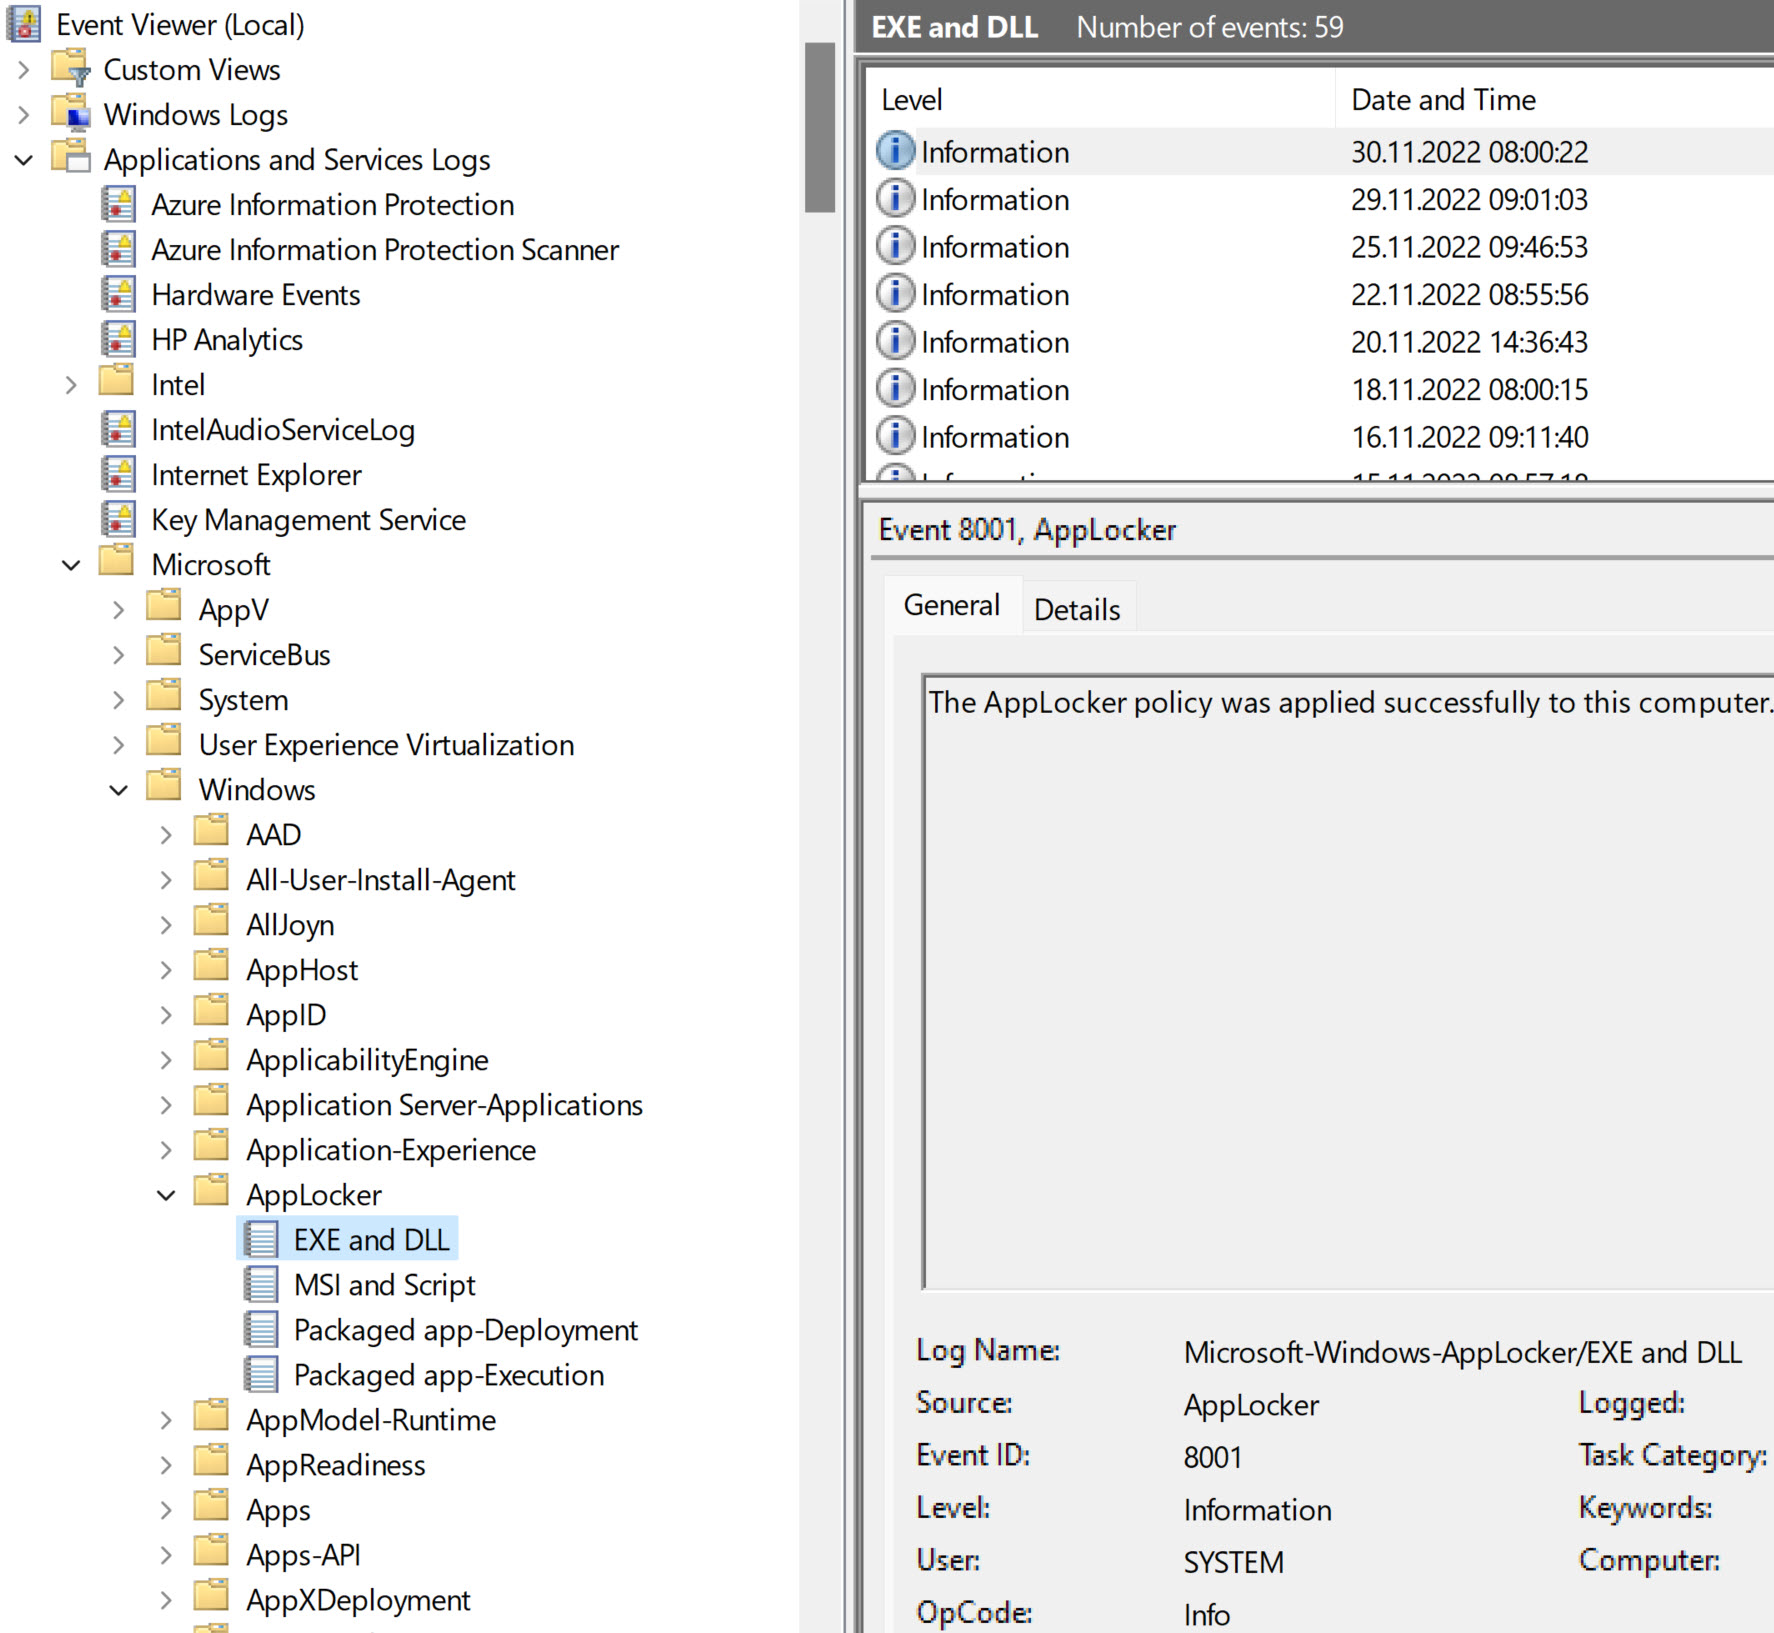
As mentionned above always test the policy on Dev/Test devices before proceeding with next 'assignment waves'. When the policy is assigned and applied to your device AppLocker events will be logged in Event Viewer:
Troubleshoot Duplicat Nodes in your XML
The Test-AppLockerPolicy command described above will indicate that there are duplicates or missplaced items in your .xml file but it will not correct them unfortunately. When the xml file in question contains around 10'000 lines, it's hard to identify duplicates or misconfigurations. So, for duplicated 'Nodes' I used the following powershell command:
[xml]$xml = Get-Content "F:\AppLocker\Win10_AppLocker.xml" -rawThe above will read content form your .xml file.
$Xml.AppLockerPolicy.RuleCollection[0].FilePublisherRule | % {$_.OuterXml} | Group-Object | % {$_.Group[0]} | Set-ClipboardThe above will Group the identical Nodes and keep only the 1st [0] item in your Clip board. Now what you have to do is paste the content in an empty file. You will need to add the 'Rule Collection Type' as fist line and close it in last line:
<RuleCollection Type="Exe" EnforcementMode="Enabled">
...
</RuleCollection>
You guessed that the '...' is what's copied in your clipboard containing the 'distinct' nodes/lines. So far you have a 'valid' xml file that will work for sure in your Test-AppLockerPolicy scenario. However, you can use an online xml formater to arrangle the nodes and child items in a more 'readable' view. An example here:
Good luck.
Leo

LO
leoel helps IT Admins